The original 2024 notes mapped RHEL 7.6/7.7/7.9 to QRadar 7.3/7.4/7.5. That table is historical, not a safe baseline for a new deployment. Select the QRadar release and update package first, then follow the exact IBM compatibility matrix and hardware requirements for that target.
1. Before you start
QRadar deployment planning begins with the target release, supported operating system, intended appliance role, and license entitlement. Do not start from a generic RHEL version recommendation or a hardware size copied from an unrelated deployment.
- Confirm the supported QRadar release and fix/update package, its RHEL requirements, and the official installation or upgrade path.
- Validate CPU, memory, storage, network interfaces, and any workload-specific requirements against IBM's appliance specification or sizing guidance.
- Confirm that the required QRadar license or software-node entitlement is available for the installation type.
- Prepare a supported hostname, time zone, management IP configuration, DNS, and required network connectivity.
- For a reinstallation or software installation, protect required data first. IBM warns that a fresh software install can erase data in
/store.
Official prerequisites: IBM QRadar hardware and software prerequisites.
2. Choose the correct installation path
Do not treat an appliance installation and a software installation as interchangeable procedures.
| Path | When it applies | Key point |
|---|---|---|
| Appliance installation | Using QRadar installation media that includes the supported operating-system image. | Boot from the correct QRadar media and follow the appliance installation workflow. |
| Software installation | Installing QRadar on hardware or a VM where you provide and prepare supported RHEL. | RHEL preparation, partitions, entitlement, and the QRadar software installer must match the target release. |
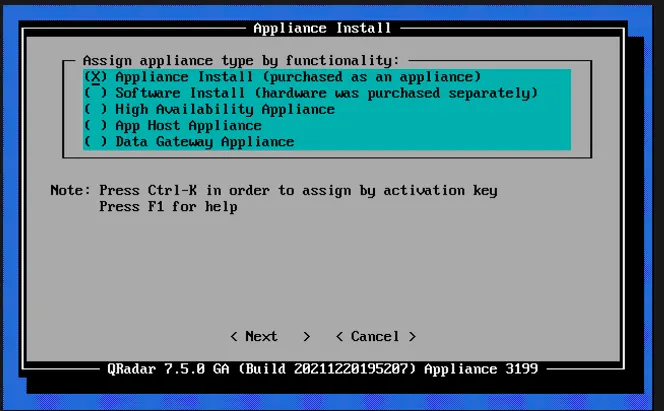
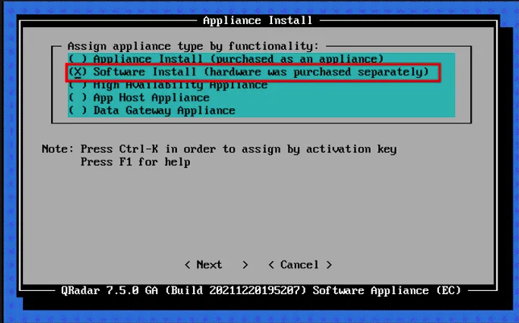
IBM's documentation distinguishes these paths. A software installation requires supported RHEL preparation; an appliance installation uses the RHEL version included with the QRadar ISO. Review the guide for your exact version before proceeding: QRadar software installations and virtual appliance installations.
3. Appliance installation: high-level workflow
- Download the approved QRadar installation ISO for the target release and verify its integrity as directed by IBM.
- Create supported boot media or attach the ISO through the server's remote-management console.
- Boot the target system from the QRadar media and select the appliance-installation path.
- Select the appliance function that matches the planned design. The available options depend on the release, entitlement, and role being installed.
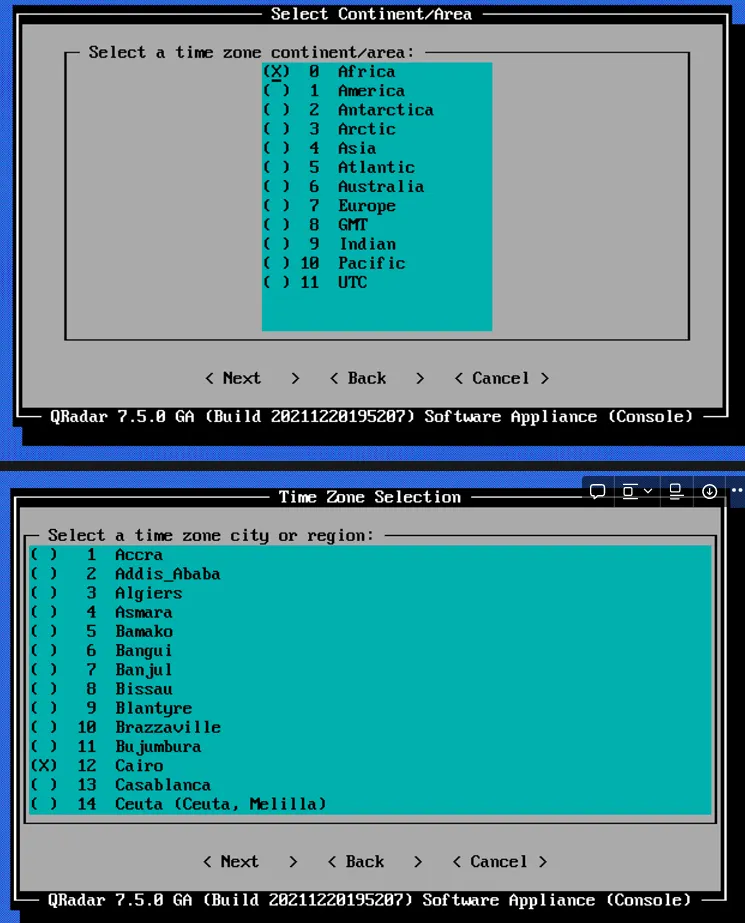
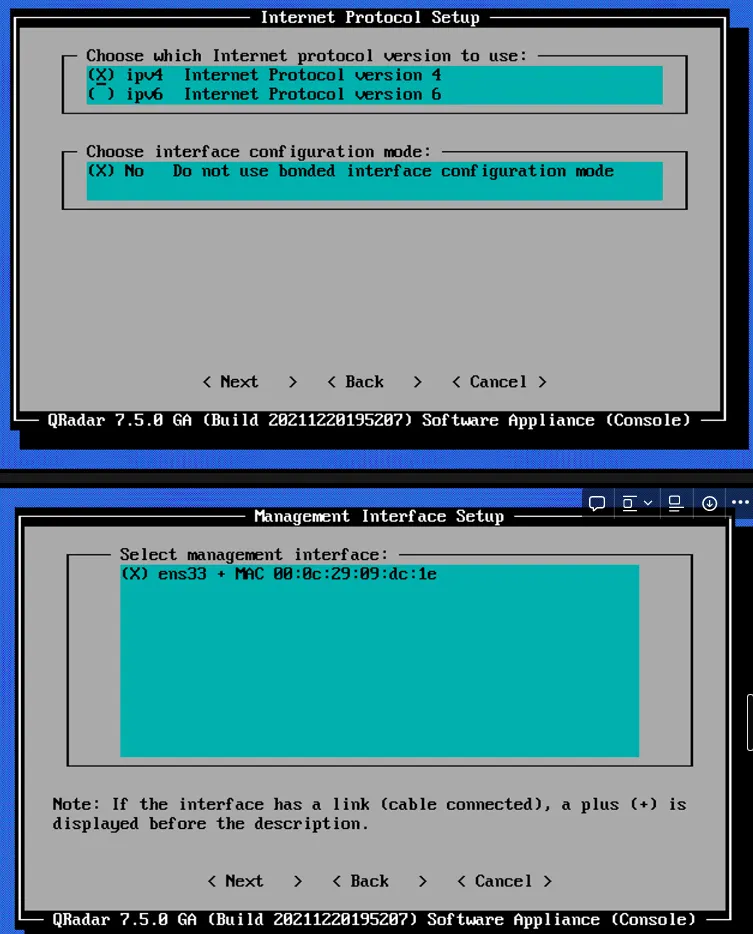
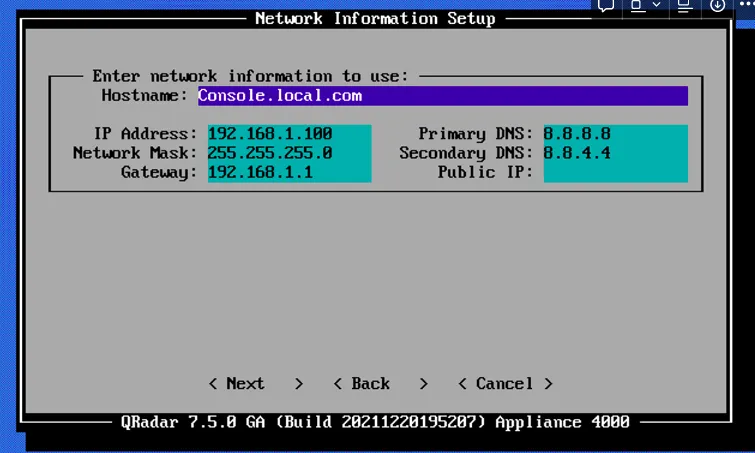
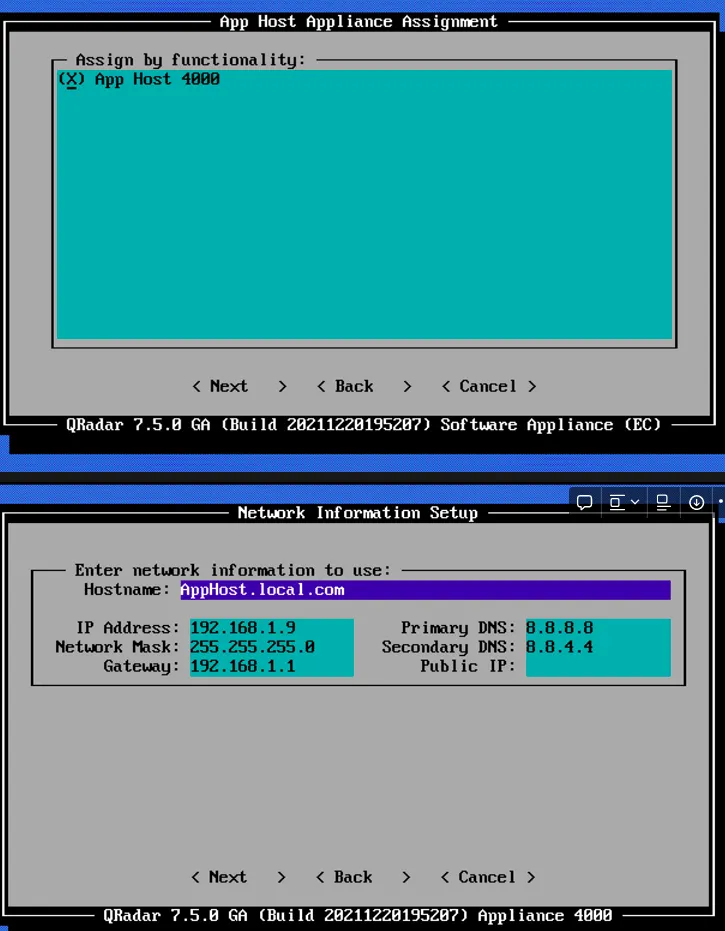
- Configure the system identity and network settings, including the management interface, fully qualified hostname, IP address, time zone, and administrator credentials as prompted.
- Complete installation, allow required restarts, then apply and allocate the appropriate license where required.
Use the version-specific procedure rather than combining screens or commands from older releases. IBM's starting point is Virtual appliance installations.
4. Software installation on prepared RHEL
This path is for a system that has already been prepared with an operating system supported by the target QRadar release. Partition layout and OS preparation must follow IBM's guidance; do not improvise partition sizes or update the operating system packages independently of the approved procedure.
- Copy the QRadar ISO to a location specified by IBM for the installation procedure (the current 7.5.0 guide identifies
/rootor/storetmp). - Create the mount directory and mount the ISO file. Replace the example filename with the real file name.
mkdir -p /media/cdrom
mount -o loop /root/qradar.iso /media/cdrom
For a fresh software installation, the documented setup launch command is:
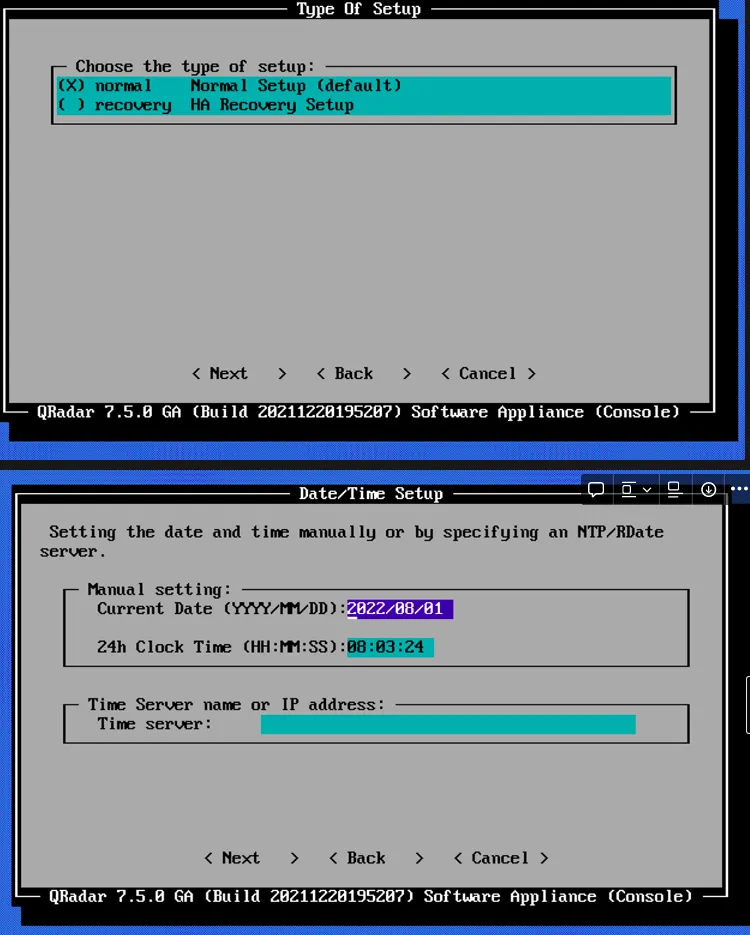
/media/cdrom/setupFollow the installer wizard for the software-install or supported HA workflow, appliance assignment, network interface, hostname, IP addressing, and other requested settings. If the chosen release's instructions specify a pretest or a different sequence, follow those instructions instead.
The command above uses an ISO file path. Bootable USB media follows a different workflow; avoid copying the older mount -o loop /dev/sdb example without confirming what the device actually represents.
Reference: Installing QRadar after the RHEL installation.
5. Select the right appliance role
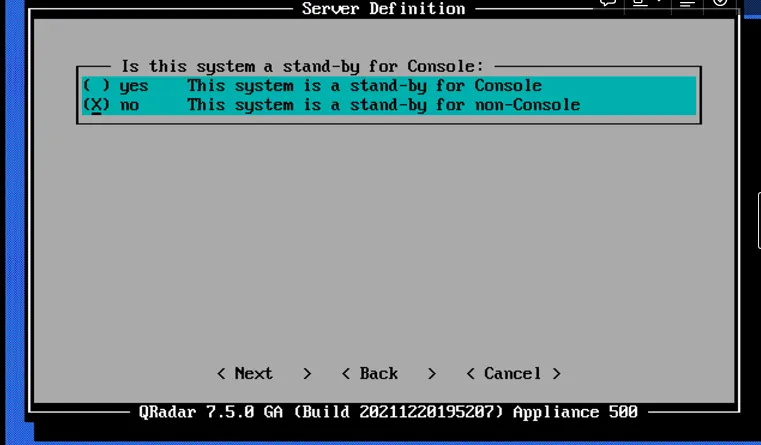
QRadar deployments can include a Console, Event Collector, Event Processor, App Host, and other specialized roles or managed hosts. High availability (HA) is an architecture decision, not just a checkbox: determine which host is the Console, document the intended active/standby roles, and follow the matching HA requirements.
Console / All-in-One
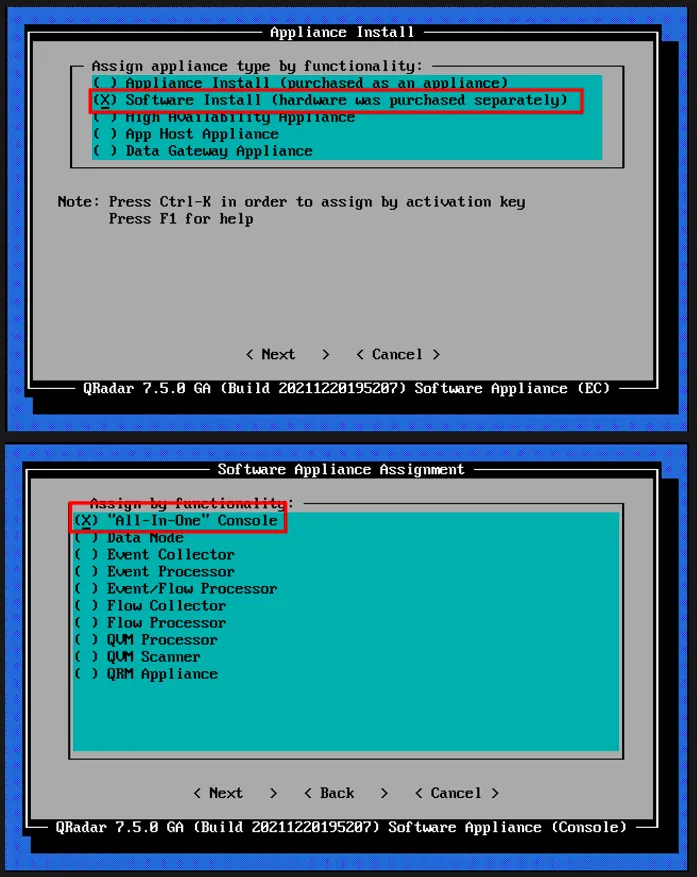
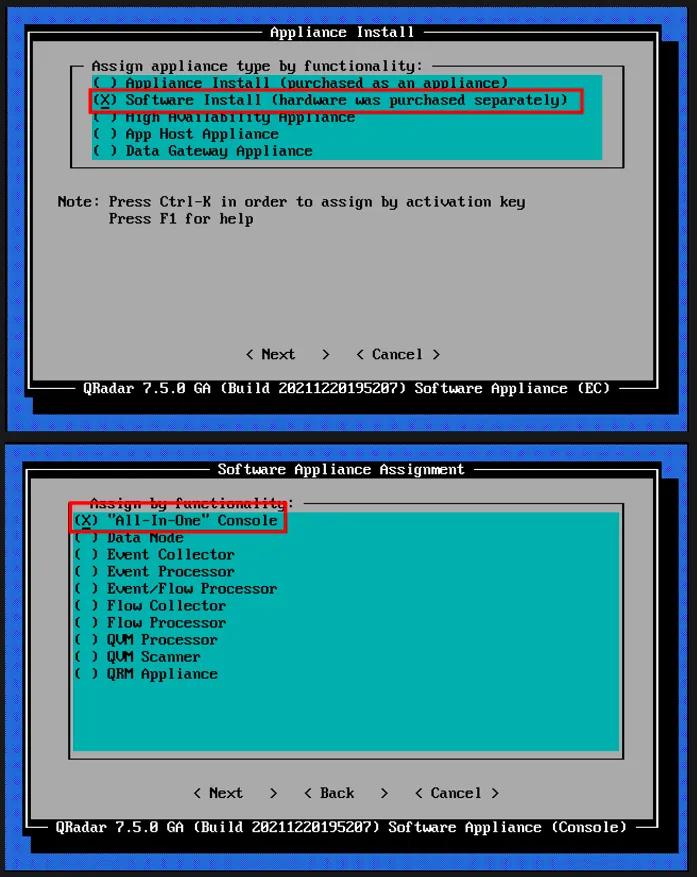
For the software-install path shown in the installer, choose Software Install (hardware was purchased separately), then select All-In-One Console as the assignment. Continue through the shared installer prompts for your target QRadar release, and confirm that sizing and licensing support this deployment model.
Event Collector / Event Processor
Use these roles when the deployment separates log collection from event processing and Console management. Assign the intended role and confirm the host's required sizing, licensing, network reachability, and managed-host design.
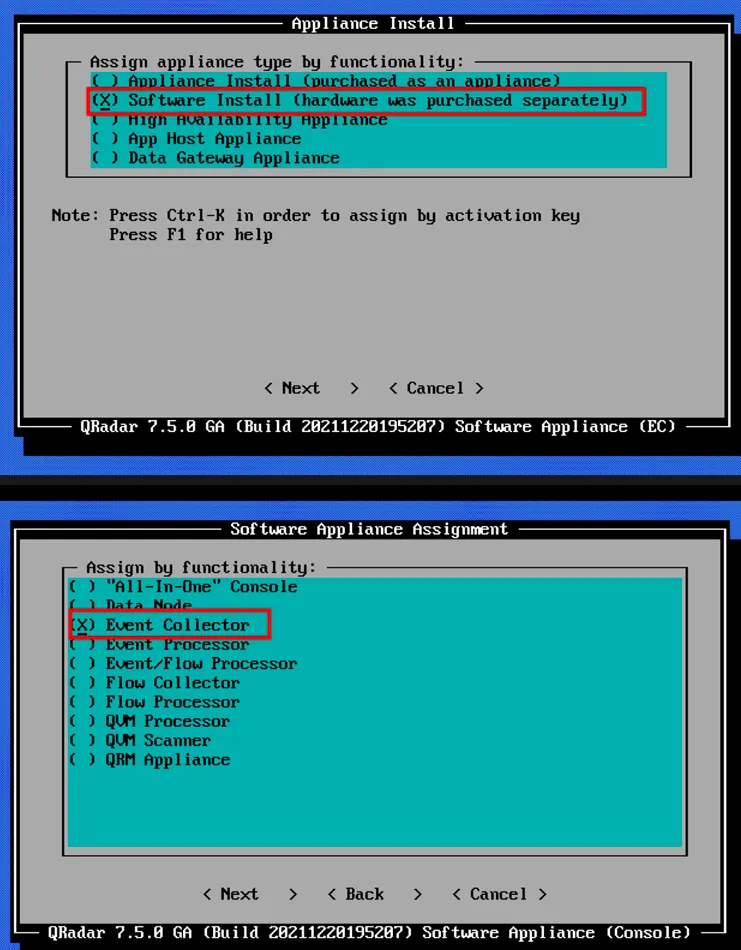
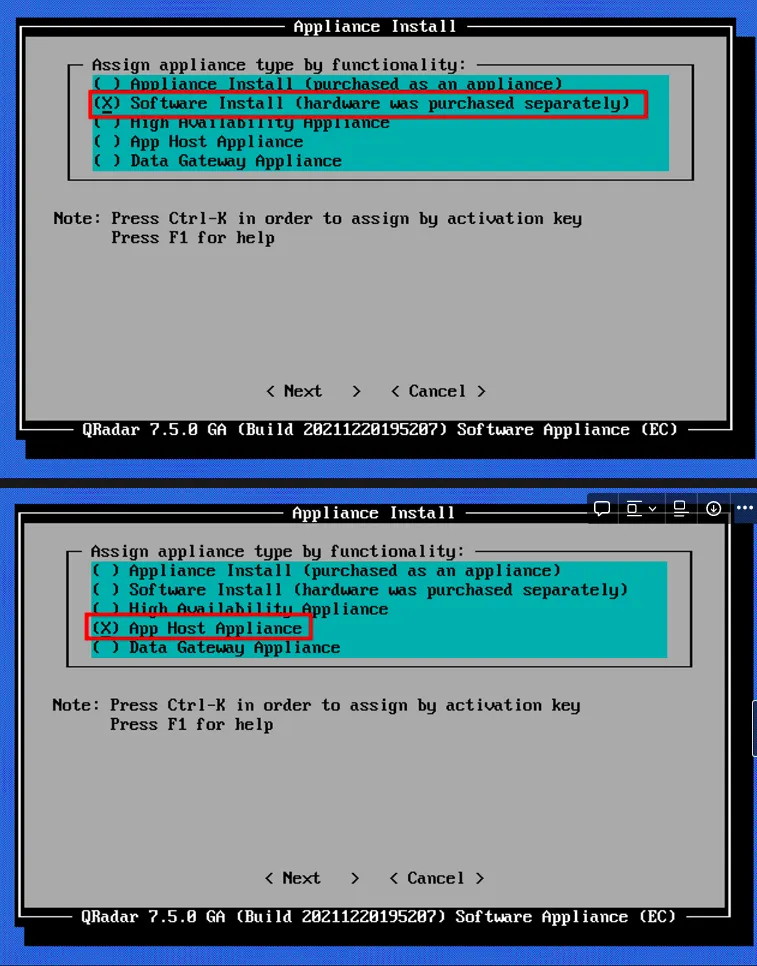
App Host
An App Host supplies application workload capacity separate from the Console. Select this role only when it matches the deployment plan and application requirements.
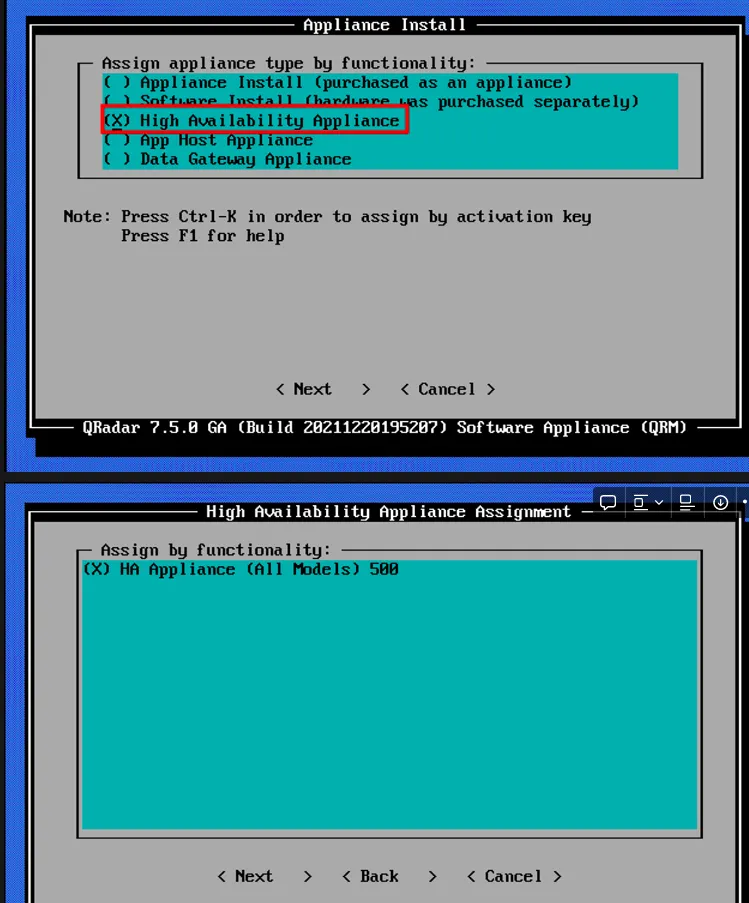
High Availability (HA)
HA is a paired deployment, not a standalone appliance role. The primary and secondary systems must satisfy the supported version, activation-key, resource, network, and storage requirements for the target release.
QRM
Select the QRM role only when QRM is part of the planned and licensed QRadar architecture. Confirm the exact role name and prerequisites shown by the installer for your release.
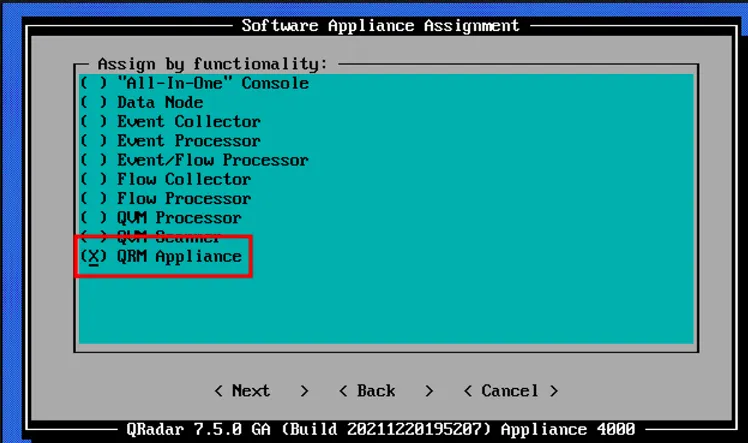
Role availability and exact installer screens vary by QRadar release, license, and appliance type. Confirm the role and entitlement before proceeding, and use the matching IBM installation guide for any role-specific steps.
6. Post-install validation
- Confirm that the installed release and update package match the planned version on each host.
- Log in to the QRadar UI, confirm licensing, verify system and network configuration, and complete the required deployment actions.
- On a Console deployment, open System and License Management and verify the expected systems and license allocations.
- Run the supported health checks on each applicable host. A console-only check does not automatically validate every managed host in a distributed deployment.
- Verify real data flow: confirm that expected log sources are communicating, recent events are visible, and searches return data. A successful installation command alone does not prove ingestion is healthy.
The companion QRadar health-check guide covers DrQ, Recon, and Cliniq and explains what each one can—and cannot—tell you.
7. Official references
- Prerequisites for installing QRadar on your hardware
- Installing QRadar after the RHEL installation
- QRadar software installations
- Virtual appliance installations
IBM's supported release matrix can change. Before deployment, verify the target release against its installation guide and release notes. For production, use an approved change plan and a verified backup.
For QRadar deployment planning, architecture review, or installation readiness, contact me before the change window.